A cricket trap is a container with a lid designed for trapping and subsequently releasing crickets. The lid captures the crickets as they attempt entry, yet it features openings that facilitate airflow, permitting their escape. This construction method prevents issues such as mold and decay due to the ample ventilation provided within. A pest control company can supply you with an efficient cricket trap, but if you’re considering crafting your own, here’s the method to follow!
Contents
- 1 Materials You Need in Making a Cricket Trap
- 2 Step One: Prepare the Crate or Box
- 3 Step Two: Add Netting or Screen
- 4 Step Three: Installing the Light
- 5 Step Four: Putting the Bait
- 6 Step Five: Set the Trap
- 7 Step Six: Observing the Trap the Next Day
- 8 How To Prevent Crickets from Returning
- 9 When to Hire Professionals
- 10 Conclusion
Materials You Need in Making a Cricket Trap
Making a cricket trap is not as complicated as it seems. You can buy materials in your local stores so that you won’t have to spend too much.
Here are the materials needed to make the trap:
- Netting or screen
- Staple gun
- Wooden crate or box
- Pair of scissors
- light
- Small piece of wood
- Bait
Step One: Prepare the Crate or Box
The first step is to prepare the crate or box that you will be using for your cricket trap. It depends on you what size of crate you would use. If you have large numbers of crickets in your home, then it is best that you use a box that could fit them all.
Step Two: Add Netting or Screen
Attach the netting or screen to the top of the crate or box by stapling it. Make sure that it is tight and secured so that crickets cannot escape. This will also ensure that crickets will be attracted to the bait as it is not hidden from them.
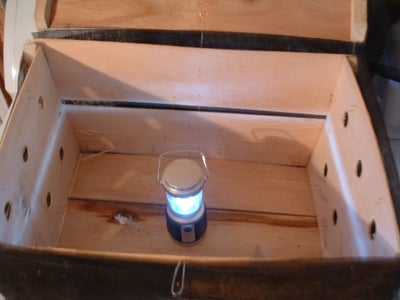
Step Three: Installing the Light
After stapling the netting, the next step is to attach the light to your trap. Crickets are known to be very attracted to bright lights because they use them as a guide when they’re looking for food. You can use any type of light, but a small fluorescent light works best.
Step Four: Putting the Bait
The next step is to put the bait in place. You can use anything as bait, but we recommend using something that crickets like, such as fruit or vegetables. Once you have added the bait, your cricket trap is ready to be set!
Step Five: Set the Trap
The following step is to set the trap. Place it in an area where you have seen crickets or where you think they might be hiding. Make sure that the light is on and wait for the crickets to come.
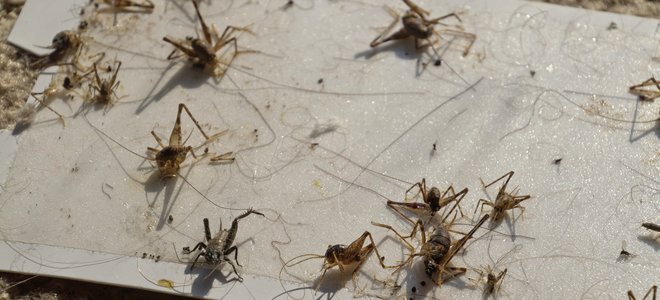
Step Six: Observing the Trap the Next Day
Check the trap the next day and see if there are any crickets inside. If there are, release them outside, away from your home. If there aren’t any crickets, then you will need to add more bait and wait for another night.
How To Prevent Crickets from Returning
Once you have released the crickets from your trap, it is important to know how to prevent them from returning to your home. There are a few things that you can do to make sure that they don’t come back:
- Seal all cracks and openings in your home where crickets might be able to enter.
- Add a cricket repellent such as cayenne pepper or diatomaceous earth around your home.
- Set up a cricket trap so that you can catch them before they enter your home.
When to Hire Professionals
If you’re still having a lot of trouble getting rid of crickets or if they are still causing damage to your home even when you have set your traps, it might be time to hire professionals. A pest control company can provide you with reliable services and an effective method to get rid of them for good!
In addition, professionals will also provide you with tips that will help you ensure that you will not have to deal with crickets anymore.
Conclusion
This article has given information about how to do so, including what kind of materials are needed, where to find these items, suggestions for bait, and more. Hopefully, this will be enough knowledge for someone who wants to try making their own cricket trap.
If you have more concerns, please feel free to give us a call today!